

That foamy, frothy top of any latte is one of the most delicious and cozy tastes and the reason we dish out hundreds of dollars each year for barista-made lattes. However, you can absolutely froth oat milk at home using these 8 different ways for a delicious homemade oat milk latte!

The use of oat milk in lattes has increased over the past few years and in general oat milk gained popularity in all types of drinks. Some coffee shops now have oat milk as their default milk for lattes! In fact, American households drink less cow milk every year!
Jump to:
Remember, when it comes to frothing milk in general, and especially frothing oat milk, there is a learning curve and practice helps a lot. I hope that this guide to frothing oat milk will provide you with all the tips you need to feel confident!
Why Froth Oat Milk?
Firstly, why froth oat milk at all? Well, frothing oat milk or any type of plant-based milk, is a common practice in the culinary world, especially in coffee shops and cafés. Frothing adds texture and creates a creamy foam that both adds to the taste and presentation of drinks.
Frothing oat milk helps with:
- Texture and Mouthfeel: Frothing oat milk creates microbubbles that give the milk a creamy and velvety texture. This adds a pleasant mouthfeel to beverages like lattes, cappuccinos, and hot chocolate.
- Aesthetics: A well-frothed milk creates beautiful latte art and visually appealing beverages. Frothing milk correctly is the first step in learning and achieving latte art!
- Flavor Distribution: Frothing helps distribute flavors evenly throughout the beverage. This ensures that the flavors are well-integrated and you don't end up with a separated drink.
- Temperature Control: Frothing also involves heating the milk. This is particularly important for hot beverages, as frothing ensures that the milk is heated uniformly and doesn't scorch or burn.
- Vegan and Lactose-Free Options: Frothing oat milk makes it easier for those who are vegan or lactose intolerant to enjoy a wide range of coffee and milk-based drinks that were traditionally made with dairy milk.
- Nutritional Content: While dairy milk and oat milk have different nutritional profiles, frothing oat milk can help retain some of the nutrients present in the milk, making it a good source of vitamins and minerals when used in frothy beverages.
- Customization: Frothing milk allows for customization of beverages. You can control the level of frothiness to match your preference, whether you like a dense foam or a light froth.
Choosing the Right Barista Milk
Barista milk, such as barista oat milk, is specifically made for coffee and espresso drinks. It’s favored by baristas all over for its ability to create a creamy, stable foam ideal for latte art and consistent textures. When looking on your own for the best barista oat milk, aim for high protein content as that ensures lasting foam.
While you can use any non-dairy milk alternatives for frothing, almond, soy, and coconut milk are the best alternatives to oat milk in terms of frothing ability and taste. Almond milk froths well due to its high fat content and provides a subtle nutty flavor, soy milk has a high protein that suits frothing, and coconut milk, though frothable, may introduce distinct coconut notes.
Which Oat Milk Variety to Choose for Frothing
There are three types of oat milks: original (or plain), barista blend, and flavored (like chocolate, vanilla, etc.).
Original Oat Milk:
Original oat milk is a versatile and widely available option. It's made by blending oats with water and straining to remove solids. Original oat milk is the cleanest oat milk type and is typically suitable for a variety of uses.
Try original oat milk in recipes like breakfasts, creamy hot chocolates, or dinners such as soups.
Barista Blend Oat Milk:
Barista blend oat milk is specially formulated to froth and steam well, making it ideal for coffee and espresso drinks commonly served in cafes. This type of oat milk often has a higher fat content compared to the original version, which contributes to its creamy frothability.
Barista blends may contain stabilizers or thickeners like gums (e.g., guar gum, xanthan gum) to help maintain the foam for longer periods. These additives can enhance the milk's texture, but some people prefer to avoid them due to dietary preferences or sensitivities.
Flavored Oat Milk:
Flavored oat milk ranges from vanilla and chocolate to more unique options like matcha or chai. These flavored versions are usually sweetened and may contain additional natural flavors or extracts to achieve the desired taste profile.
Some flavored oat milks might have added sugars, so it's essential to check the ingredient list if you're concerned about sugar content. These milks can be enjoyed on their own or used as a flavorful addition to beverages, smoothies, and breakfast recipes.
Equipment Needed
 Buy Now →
 Buy Now →
 Buy Now →
 Buy Now →
 Buy Now →
(affiliate link)
Using a Steam Wand
A steam wand is how baristas in coffee shops froth any type of milk for lattes from. It is the most professional and also hardest to learn. However, it does achieve the most consistent and best froth for any type of latte.
Using a steam wand is a difficult technique, but to summarize how to use one to froth oat milk:
- Pour cold barista oat milk into a frothing pitcher (affiliate link), about ½” below the start of the spout.
- Insert the steam wand into the frothing pitcher, ensuring the wand's tip is just below the milk's surface.
- Turn on the steam wand to begin releasing steam into the milk. Position the frothing pitcher at a slight angle to encourage proper aeration.
- Aim to create a whirlpool motion in the milk by keeping the steam wand positioned off-center and slightly tilted. This motion helps evenly distribute the steam and create a creamy texture.
- As you froth the milk, gradually lower the pitcher to keep the steam wand just beneath the milk's surface. This action both froths and heats the milk simultaneously. As the milk continues to foam and grow, you will have to continually lower the pitcher.
- Pay attention to the temperature of the milk. For most beverages, aim to heat the milk to around 150-160°F (65-70°C). If your steam wand doesn’t provide the internal temperature, you will know that it has reached the proper temperature once the frothing pitcher becomes too hot to touch for longer than 3 seconds straight.
- Once the milk reaches your desired temperature and the foam is thick and creamy, turn off the steam wand.
- Gently tap the frothing pitcher (affiliate link) on a flat surface to break any larger bubbles and create a smooth foam. Then, give the pitcher a few swirls to integrate the milk and foam further.
- Carefully pour the frothed oat milk into your espresso, latte, cappuccino, or other beverage of choice. Use a spoon to hold back the foam if needed.
Using a Milk Frother
Not to be confused with a hand frother (affiliate link), a standalone milk frother (affiliate link) is a convenient way to achieve consistent and high-quality frothed oat milk. These machines are designed specifically for frothing milk and can produce creamy foam with ease. Simply follow the manufacturer's guidelines for your specific milk frother model to ensure the best results.
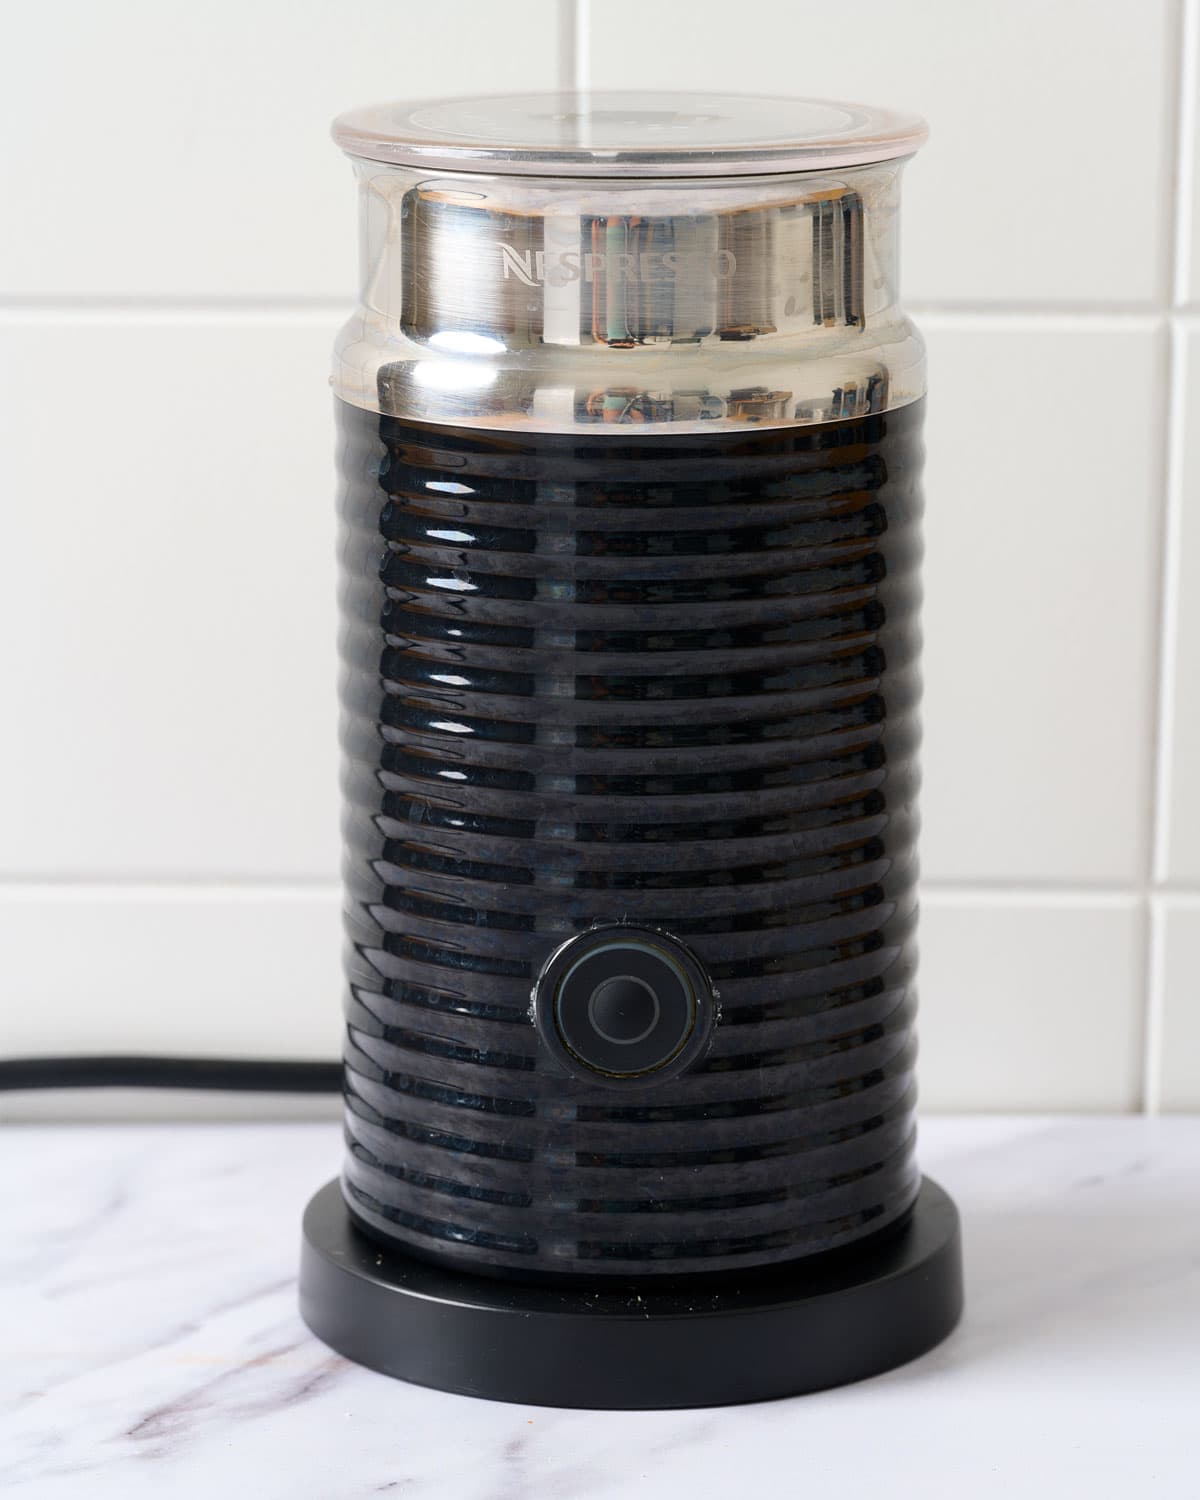
To use a milk frother (affiliate link) to froth oat milk:
- Ensure your oat milk is at the desired temperature. If you're making a hot beverage, you can gently heat the oat milk on the stovetop or in the microwave. For a cold beverage, you can use the oat milk directly from the refrigerator.
- Pour the oat milk into the milk frother's frothing container. Most standalone milk frothers have specific markings indicating the maximum level for frothing, so pay close attention to that mark.
- If the recipe calls for adding any sweeteners or flavorings to your frothed oat milk, do so at this stage.
- Close the lid of the milk frother securely to prevent any splattering during the frothing process.
- Depending on your milk frother (affiliate link) model, select the appropriate frothing mode. Many machines have different settings for hot froth and cold froth. Choose the one that matches your desired beverage.
- Press the start button to begin the frothing process. The machine will activate the frothing mechanism, which may include whisking or spinning to introduce air into the milk.
- Keep an eye on the milk frother as it operates. It will automatically stop when the frothing process is complete. This typically takes a minute or two.
- Once the milk frother has finished frothing, carefully pour the frothed oat milk into your beverage of choice. You can use a spoon to hold back the foam if needed.
Using a Hand Frother
Using a hand frother (affiliate link) is a convenient and effective way to froth oat milk, both for hot and cold beverages. The froth may not be as dense as what you'd get from a steam wand on an espresso machine (affiliate link), but it's a great option for home use and provides a satisfying texture to your drinks!
To use a hand frother (affiliate link) to froth oat milk:
- If you're making a hot beverage, gently heat the oat milk in a microwave-safe container or on the stovetop until it's warm but not boiling. If you're making a cold beverage, skip this step.
- Pour the desired amount of oat milk into a heat-resistant container (for hot beverages) or a glass for cold beverages. Leave some space at the top to accommodate the frothing process.
- Insert the frother's whisk end into the oat milk. Make sure the whisk is fully submerged but not touching the bottom of the container.
- Turn on the hand frother (affiliate link). Hold the frother at a slight angle in the milk, close to the surface.
- Move the frother up and down in a gentle pumping motion while keeping it near the surface. The whisk's spinning motion will introduce air into the milk, creating foam. Froth for about 15-30 seconds, or until you achieve the desired amount of foam.
- Gently pour into your beverage of choice!
Using a Jar
Using a jar to froth oat milk is a similar idea to using a jar to make ice cream or whipping cream! It is best for cold milk used for iced lattes. While the foam may not be as dense and velvety as what you'd get from a steam wand or electric frother, the jar method is a great alternative that doesn't require any special equipment.
To froth oat milk using a jar:
- If you're making a hot beverage, gently heat the oat milk in a microwave-safe container until it's warm but not boiling. If you're making a cold beverage, skip this step.
- Pour the desired amount of oat milk into the glass jar. Leave some space at the top to allow for shaking and frothing, about half the jar minimum.
- If the recipe requires sweeteners or syrups: add sweeteners, syrups, or flavorings to the oat milk in the jar.
- Seal the jar completely and tightly to prevent leaks.
- Shake vigorously for about 15-30 seconds. The shaking will introduce air into the oat milk and create the foam.
- After shaking, open the jar and check the consistency of the foam. It should be creamy and good volume. If it’s not the frothiness you desire, place the lid back on and shake a few more seconds further.
- Gently pour the frothed oat milk into your drink of choice.
Using a Blender
Using a high-powered blender (affiliate link) to froth oat milk is a makeshift method and might not produce the same quality of foam as specialized frothing tools. However, if you're in a pinch and want to add a bit of frothiness to your drinks, this method can be helpful.
To froth oat milk using a high-powered blender (affiliate link):
- If you're making a hot beverage, gently heat the oat milk on the stovetop or in the microwave until it's warm but not boiling. For a cold beverage, you can use the oat milk directly from the refrigerator.
- Pour the oat milk into the blender, leaving some space at the top to allow for expansion during the blending process.
- If the recipe requires sweeteners or syrups: add sweeteners, syrups, or flavorings to the oat milk in the jar.
- Begin by blending on a low speed setting. This will help prevent splattering and allow you to control the blending process.
- Blend the oat milk for about 10-20 seconds on the low setting. After this initial blending, stop the blender and check the foam's consistency.
- If you see some foam forming, gradually increase the blender's speed to a higher setting. Keep in mind that blenders are powerful, so increasing the speed too quickly might lead to excessive foam or splattering.
- Continue blending for another 20-30 seconds on the higher speed setting. Monitor the foam's progress and texture as you blend.
- After blending for a total of around 30-50 seconds, stop the blender and check the foam's consistency. The foam might not be as dense as what you'd achieve with a dedicated milk frother (affiliate link), but it should have some level of creaminess.
- Gently pour the frothed oat milk into your coffee or other beverage.
Using a Food Processor
While using a food processor (affiliate link) for frothing is not the most efficient method, it might produce some foam, especially if you have a model with a high-speed setting. However, please be aware that food processors are not designed for frothing liquids, and this method may not yield the same results as dedicated milk frothers, steam wands, or other frothing techniques.
To froth oat milk using a food processor:
- If you're making a hot beverage, gently heat the oat milk on the stovetop or in the microwave until it's warm but not boiling. For a cold beverage, you can use the oat milk directly from the refrigerator.
- Pour the oat milk into the food processor (affiliate link), leaving some space at the top to allow for expansion during the frothing process.
- If the recipe requires sweeteners or syrups: add sweeteners, syrups, or flavorings to the oat milk in the jar.
- Turn on the food processor at a low speed setting. Since food processors are not designed for frothing liquids, you'll want to start at a low speed to avoid splattering.
- Allow the oat milk to process in the food processor for a short period, about 10-20 seconds. After this time, pause the food processor and check the consistency of the foam.
- If the oat milk has started to foam a little, you can gradually increase the speed of the food processor to see if it creates more froth. Be cautious, as increasing the speed too quickly can lead to splattering.
- After running the food processor (affiliate link) for a total of around 30-40 seconds, stop and check the foam's consistency. Keep in mind that the foam might not be as dense as what you'd achieve with other frothing methods.
- Gently pour the frothed oat milk into your coffee or other beverage. Use a spoon to hold back the foam if needed.
Using an Electric Hand Mixer
Using an electric hand mixer is an easier way to whisk a froth in oat milk than by hand. To do this:
- Pour barista oat milk also into a large, wide bowl, with high sides to avoid a mess. Leave enough space at the top to accommodate expansion of the oat milk that occurs when frothing.
- Place the hand mixer into the oat milk, making sure the whisk is fully submerged but not touching the bottom.
- Start frothing on a low speed to prevent splattering. Increase the speed gradually to medium-high, moving the mixer up and down to create aeration and foam.
- Keep an eye on the froth, once it reaches your desired level of foam, turn off the hand mixer and pour into your latte!
- If you desire a hot oat milk latte, microwave until warm and then pour into your beverage.
Using a Whisk by Hand
Using a hand whisk to froth oat milk requires a bit more manual effort than using an electric frother, but it can still yield good results. This is the hardest way to froth oat milk, because it takes a lot of patience and consistency.
Here's how you can froth oat milk using a hand whisk:
- If you're making a hot beverage, you can start by gently heating the oat milk in a saucepan over medium heat. Heat the milk until it's warm, but not boiling.
- Pour oat milk into a heat-resistant container or bowl, leaving some space at the top to accommodate frothing.
- Hold the whisk making sure that the wires are facing downward. Submerge the whisk into the oat milk, near the surface of the milk.
- Whisk vigorously, rapidly moving back and forth in a vertical motion. This is to introduce air into the milk, which creates that foam.
- Whisk for about 1-2 minutes, or until you achieve the desired froth. The longer you whisk, the more foam is created.
- Pour frothed oat milk into your latte and serve.
Expert Tips and Best Practices
Monitor the Temperature of the Milk
Use a thermometer or your hand to read the temperature of oat milk. I suggest a digital meat thermometer (affiliate link) or your espresso machine (affiliate link)’s steam wand may measure the internal temperature. You can also measure the temperature from your hand (carefully).
If frothing with a steam wand, your hand can estimate when the temperature is hot enough. Holding onto the frothing pitcher (affiliate link), when your hand reaches the point that it can only hold on for no more than 3 seconds, the milk temperature is perfect and you can stop frothing immediately.
Optimal Frothing Temperature
For most purposes, including lattes, cappuccinos, and other espresso-based drinks, the optimal temperature range for frothing oat milk is around 150ºF to 155ºF.
- Cappuccinos and Lattes: For these drinks, aim for a milk temperature between 150°F and 155°F (65°C to 68°C). This temperature allows the milk to blend well with the espresso and create a creamy texture.
- Hot Beverages: If you're frothing oat milk for a hot chocolate or other hot beverages, a temperature around 160°F (70°C) might work well. This slightly higher temperature can complement the richness of hot cocoa.
Ultimately, the "best" temperature can vary based on your taste preferences. Some might prefer a slightly cooler temperature for a creamier mouthfeel, while others might enjoy a slightly hotter temperature for a bolder flavor.
Feel free to adjust within the recommended temperature range until you find the perfect frothing temperature for your oat milk beverages.
Don’t Overheat or Scald Milk
Overheating or scaling the oat milk can result in a bad, burnt flavor, but also be unsafe for drinking. This happens when the oat milk temperature exceeds 170°F (77°C).
To prevent this, always use a thermometer while frothing and stop heating the milk when it reaches the desired temperature range (around 150°F for oat milk). Keep a close eye on the milk while frothing, and remember that the residual heat can continue to increase the temperature after you've turned off the steam wand.
Don’t Under-Froth
When your frothed oat milk lacks the desired texture and microfoam, you might be under-frothing. This can result in a thin and unsatisfactory foam.
To avoid under-frothing, make sure to position the steam wand correctly – the tip should be just below the surface of the milk. Keep the steam wand in this position until you achieve the desired foam volume and consistency.
It will help if the milk you're frothing is cold, as colder milk tends to froth better. If you're using a manual frother, make sure to pump or whisk the milk vigorously and consistently to create a frothy texture.
Avoid Curdling
Curdling occurs when the proteins in the oat milk denature and form clumps, resulting in an unappetizing cottage cheese-like appearance and texture. Curdling can happen when milk is heated too quickly or to too high a temperature.
To avoid curdling, heat the oat milk slowly (from cold) and gently. Use medium heat and take your time to gradually bring the milk to the desired frothing temperature.
If you're using an espresso machine (affiliate link) with a steam wand, make sure not to introduce too much air too quickly, as this can cause the milk to curdle. Keep the steam wand tip submerged and aim for a smooth, rolling motion to incorporate air evenly.
Most barista oat milk contains stabilizers, which can help prevent curdling by providing a more consistent texture.
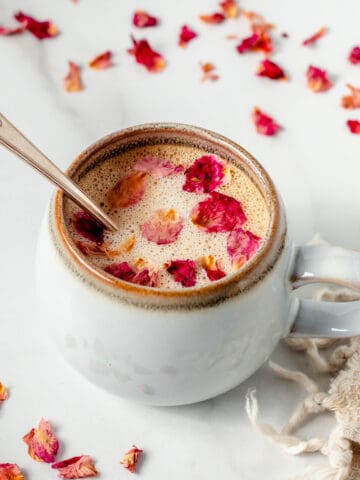
How to Use Frothed Oat Milk
Try using frothed oat milk in these latte recipes:


📖 Recipe
How to Froth Oat Milk (8 Ways)
Equipment
- 1 Milk Frother
Ingredients
- 6 ounces barista oat milk
Instructions
- Ensure your oat milk is at the desired temperature. If you're making a hot beverage, you can gently heat the oat milk on the stovetop or in the microwave. For a cold beverage, you can use the oat milk directly from the refrigerator.
- Pour the oat milk into the milk frother's frothing container. Most standalone milk frothers have specific markings indicating the maximum level for frothing, so pay close attention to that mark.
- If the recipe calls for adding any sweeteners or flavorings to your frothed oat milk, do so at this stage.
- Close the lid of the milk frother securely to prevent any splattering during the frothing process.
- Depending on your milk frother model, select the appropriate frothing mode. Many machines have different settings for hot froth and cold froth. Choose the one that matches your desired beverage.
- Press the start button to begin the frothing process. The machine will activate the frothing mechanism, which may include whisking or spinning to introduce air into the milk.
- Keep an eye on the milk frother as it operates. It will automatically stop when the frothing process is complete. This typically takes a minute or two.
- Once the milk frother has finished frothing, carefully pour the frothed oat milk into your beverage of choice. You can use a spoon to hold back the foam if needed.


Comments
No Comments